Google Flow AI Creative Studio: Everything You Need to Know (2026)
If you’ve ever tried to make a single short video using AI, you know the drill. You generate an image in one tool, animate it in another, patch together audio somewhere else, and then pray everything still looks like the same project by the time you’re done. I’ve lost entire afternoons to that workflow.
That’s exactly the mess Google is trying to clean up with Google Flow AI Creative Studio. I’ve spent the last few weeks actually building projects inside it – not just skimming the landing page – and I want to walk you through what it actually does, where it shines, and where it still frustrates me.
What Exactly is Google Flow AI Creative Studio?
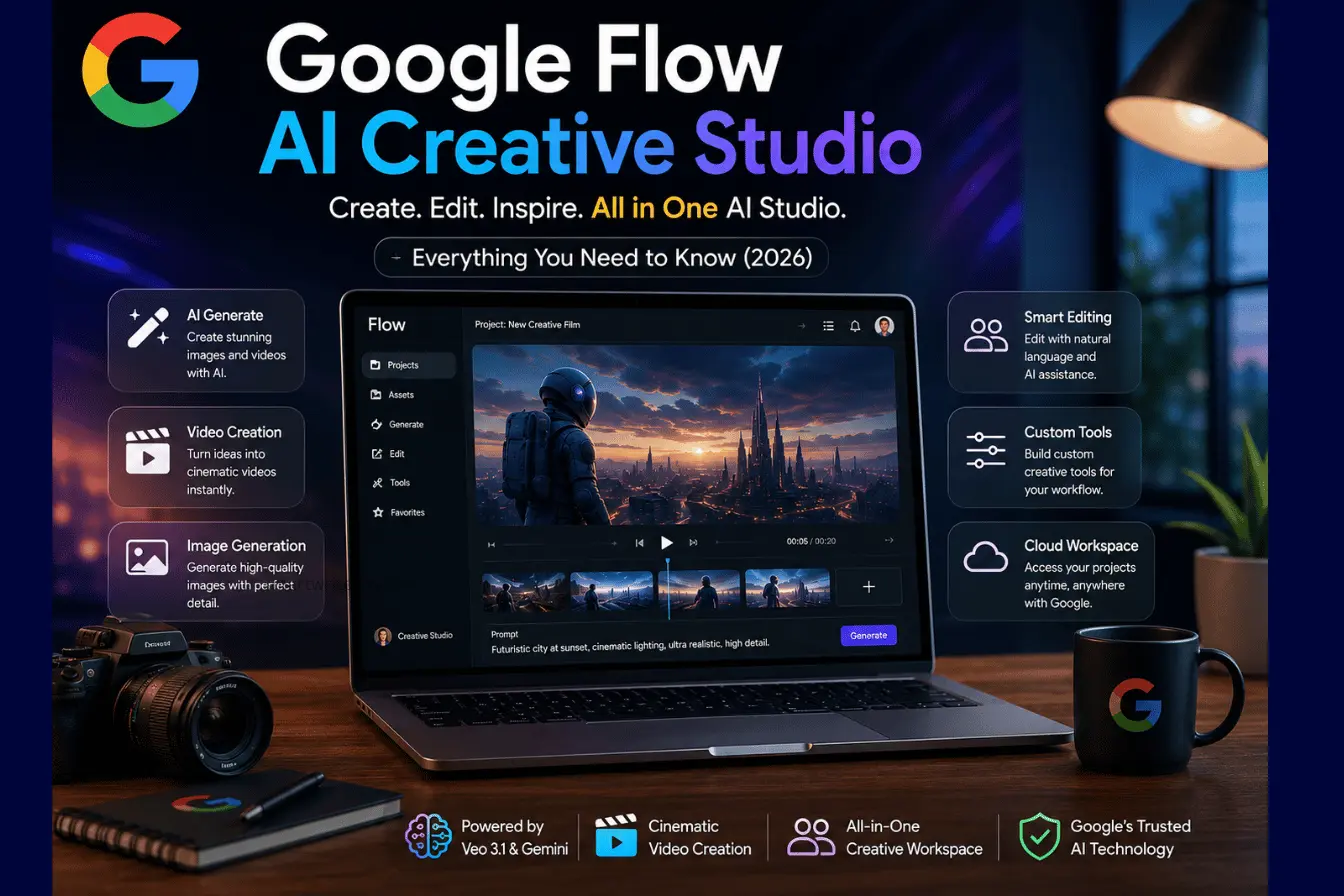
Google Flow is Google’s browser-based AI filmmaking and creative workspace, built around three model families: Veo for video generation, Nano Banana for images, and Gemini for natural-language editing and scene understanding. You can find it at flow.google.com.
It’s not a single-prompt “type a sentence, get a clip” toy. It’s built more like a lightweight production studio. You generate shots, arrange them on a timeline, keep characters and objects consistent across scenes, and refine everything using plain English instead of complicated menus.
Read More: Free AI Video Generators With No Watermark (2026 Guide)
Who is it actually for?
- Content creators and YouTubers who need B-roll or short-form video fast
- Marketers producing ad concepts or social clips without a video team
- Indie filmmakers and students prototyping scenes before a real shoot
- Bloggers and social media managers who need quick visual assets to go with written content
If your job involves turning ideas into visuals on a deadline, this tool was built with you in mind.
4 Standout Features That Make It Different
I clicked around every corner of the dashboard, and these are the four features that actually made me stop and think, “okay, this is genuinely useful.”
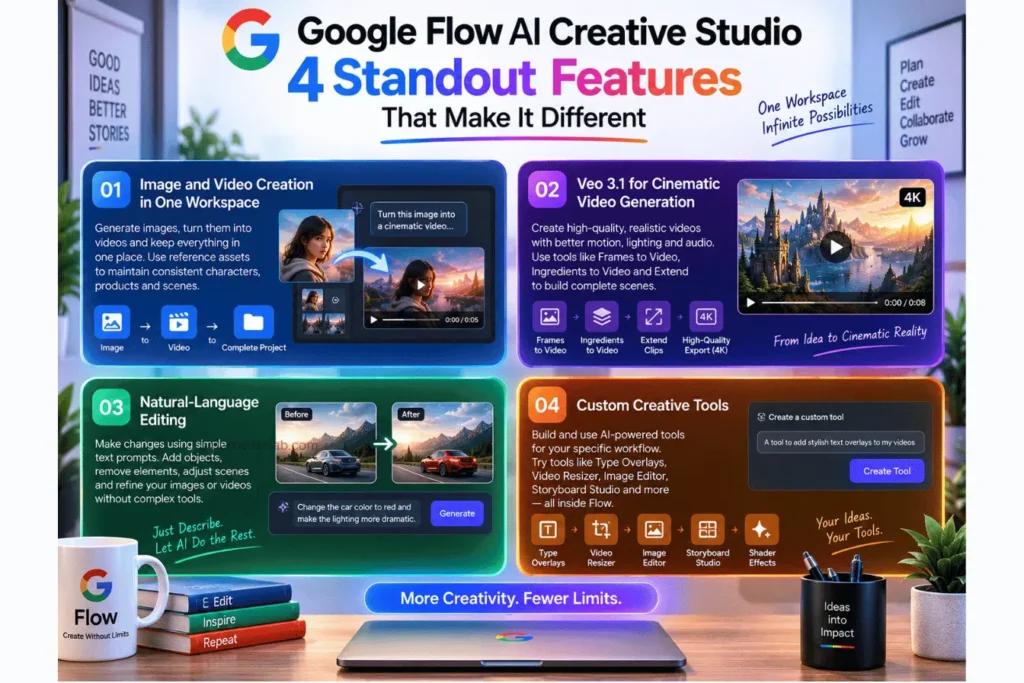
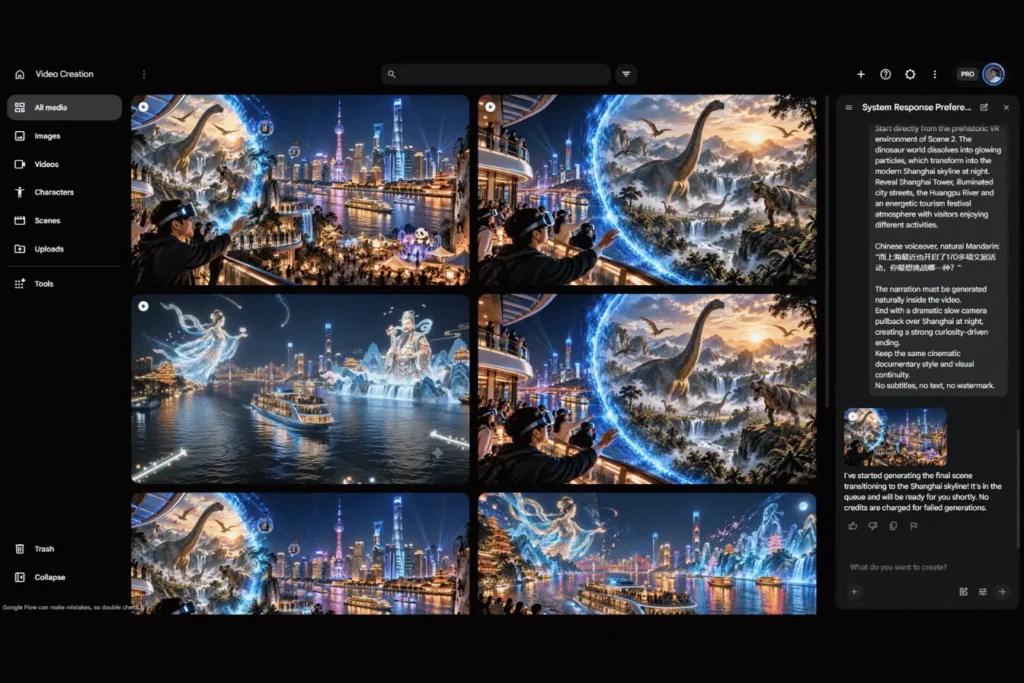
1. Image and Video Creation in One Workspace
Flow is no longer just about generating a video from a text prompt. You can create images and use them as ingredients or frames for video generation. This is useful when you want a character, product, or environment to remain visually consistent across multiple shots.
For example, you could create an image of a fictional character, refine it, and then use that asset as a reference when generating a cinematic scene.
That makes the workflow much more practical for storytelling than simply generating unrelated clips.
2. Veo 3.1 for Cinematic Video Generation
Veo is one of the main reasons Flow gets so much attention. Google says Veo 3.1 focuses on realism, prompt adherence, narrative control, and generated audio, while Flow provides tools such as Frames to Video, Ingredients to Video, and Extend.
The workflow can look something like this:
Idea → Image → Reference/Ingredients → Video → Edit → Extend
That is considerably closer to an actual creative workflow than a simple text-to-video box. Google has also added start-and-end frame controls and higher-resolution export options, including 1080p and 4K upscaling on eligible plans.
3. Natural-Language Editing
Another useful part of Flow is that you can use natural language to make creative changes instead of manually performing every operation. Google describes Flow as supporting natural-language editing for images and videos, including iterative changes to individual assets.
That can be particularly useful when your first generation is close but not quite right.
For example, you might want to:
- Add an object to a scene
- Change a visual element
- Adjust a shot
- Extend a clip
- Modify an image before turning it into video
Google has also introduced editing capabilities such as inserting elements into scenes while attempting to preserve lighting and shadows.
4. Custom Creative Tools
This is one of the less obvious features that deserves attention.
Flow allows users to create tools using natural-language instructions for specific creative workflows. Google showcases examples including Type Overlays, Video Resizer, Image Editor, Storyboard Studio, and Shader Effects.
So instead of thinking about Flow purely as an AI generator, you can think of it as a workspace where AI-assisted creative utilities can sit alongside your main project.
For someone producing repeated YouTube videos, advertisements, or social content, this could eventually save a significant amount of repetitive work.
Read More: 5 Best Lightweight Video Editors for Low-End PC in 2026 (Tested on 4GB RAM)
How to Get Started (A Quick Walkthrough)
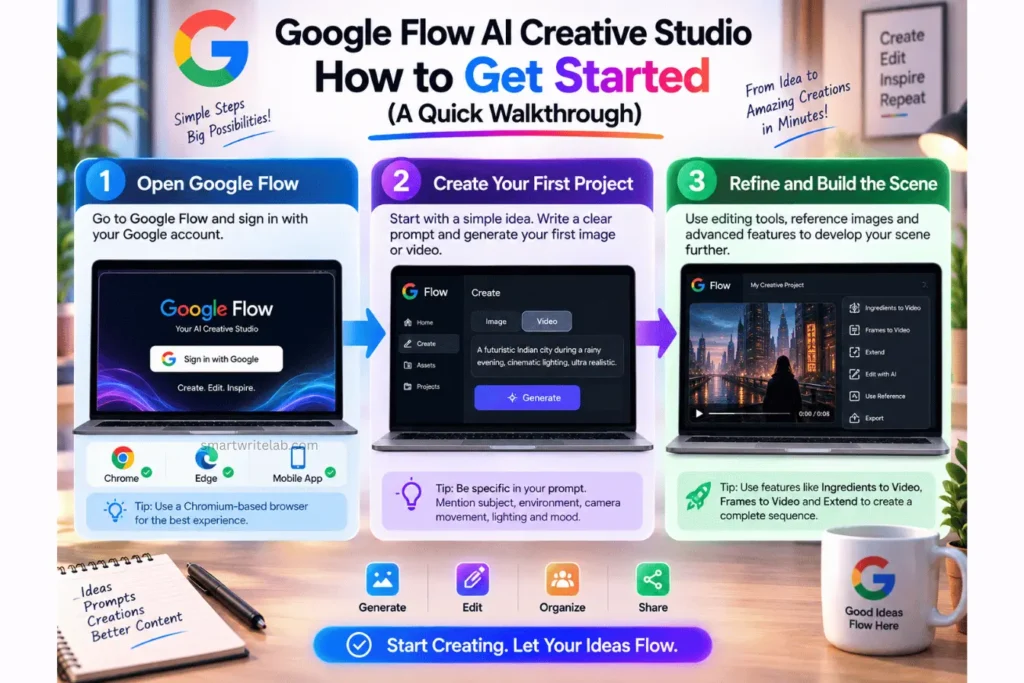
You don’t need a production background to get your first project running. Here’s the fastest path:
- Sign in and pick your plan. Head to flow.google.com and sign in with your Google account. You get a small daily free credit allowance to test things out, but for real project work you’ll want a Google AI Plus, Pro, or Ultra subscription.
- Start a project and generate your first shot. Use Text to Video for a fresh idea, or upload a reference image and use Frames to Video or Ingredients to Video if you want a specific character or object to appear.
- Refine, extend, and assemble. Use the camera controls to adjust angles, Scene Extension to lengthen a shot, and Scene Builder to arrange your clips into a finished sequence. Export when it looks right.
That’s genuinely it. The learning curve is in the details, not the basic loop.
Pros and Cons (The Honest Truth)
Pros:
- All your generative AI workflow tools live in one place – no more juggling four different apps and losing consistency between them
- Character and object consistency actually works well enough for short-form storytelling, which was a real pain point in older AI video tools
- Native audio generation saves a genuinely painful step most competitors still make you do separately
Cons:
- The learning curve is real for beginners. Camera controls, Ingredients, and Scene Builder all take some trial and error before you get consistent results
- It eats credits fast. A higher-quality generation can burn through your monthly allowance quicker than you’d expect, especially on the entry-level plans
Google Flow AI vs. Other Creative Tools
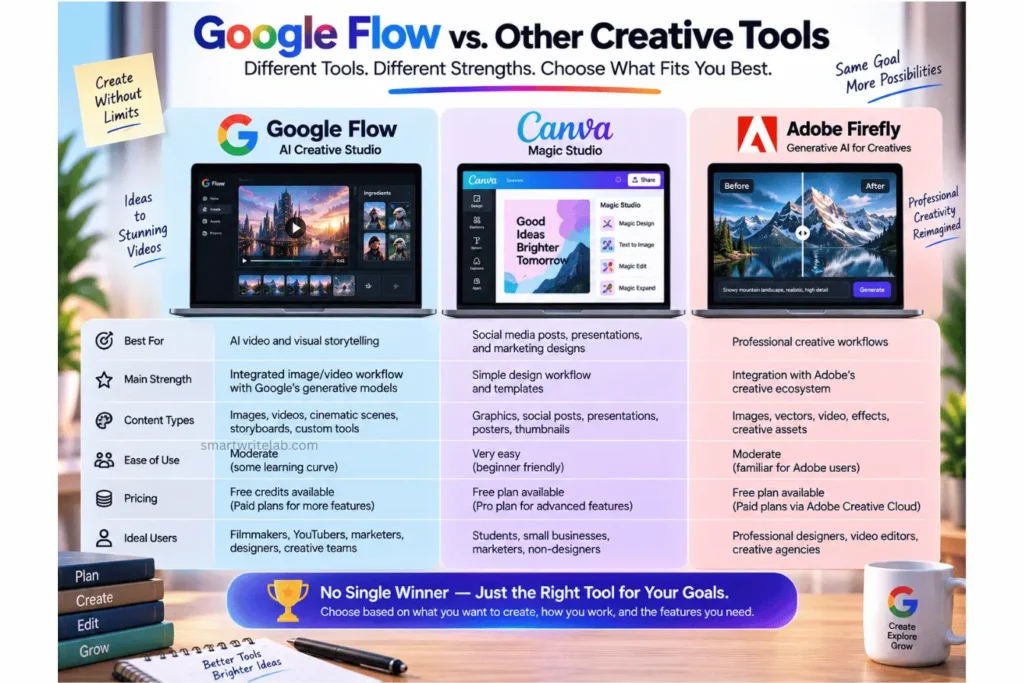
I get asked constantly how this stacks up against Canva Magic Studio and Adobe Firefly, so here’s the honest comparison.
Vs. Canva Magic Studio: Canva is still the better pick if you’re doing quick social graphics, presentation design, or simple templated content. It’s faster for one-off design tasks. Flow, on the other hand, is built specifically for video and motion; if your project involves moving footage rather than static design, Google Flow AI Creative Studio wins.
Vs. Adobe Firefly: Firefly has the edge if you’re already living inside Photoshop or Premiere and need tight integration with a professional editing pipeline. Flow is more self-contained — it’s less about plugging into existing creative software and more about being the whole studio itself, from generation to assembly.
My rule of thumb: if you’re a designer, stick closer to Canva or Firefly. If you’re a content creator or marketer making video-first content, Flow is worth the switch.
Read More: Best AI Software in 2026: The Ultimate Tech Guide
Frequently Asked Questions (FAQs)
Final Verdict: Should You Use It?
After actually building projects in it rather than just reading about it, my take is simple: Google Flow AI Creative Studio is one of the few AI design tools that genuinely reduces the number of apps you need open at once. It’s not perfect – the learning curve and credit consumption are real friction points – but the consistency and native audio alone make it worth trying if video is any part of your content strategy.
My honest next step for you: start on the free tier, build one short test project using Ingredients to Video, and see how far your daily credits take you before committing to a paid plan. That’s the fastest way to know if it fits your workflow.

Ravi Shankar Naval is the founder of Smart Write Lab, where he publishes practical content about AI tools, blogging, SEO, and digital growth. His goal is to help beginners and creators learn modern online strategies through simple, helpful, and easy-to-understand tutorials.